bitterberry

Post pictures and details of your Honda City
bitterberry
Forum Enthusiast
Posts: 176
Joined: Thu Nov 20, 2014 4:41 pm

Re: bitterberry

Postby bitterberry » Sat Jun 20, 2015 2:57 pm

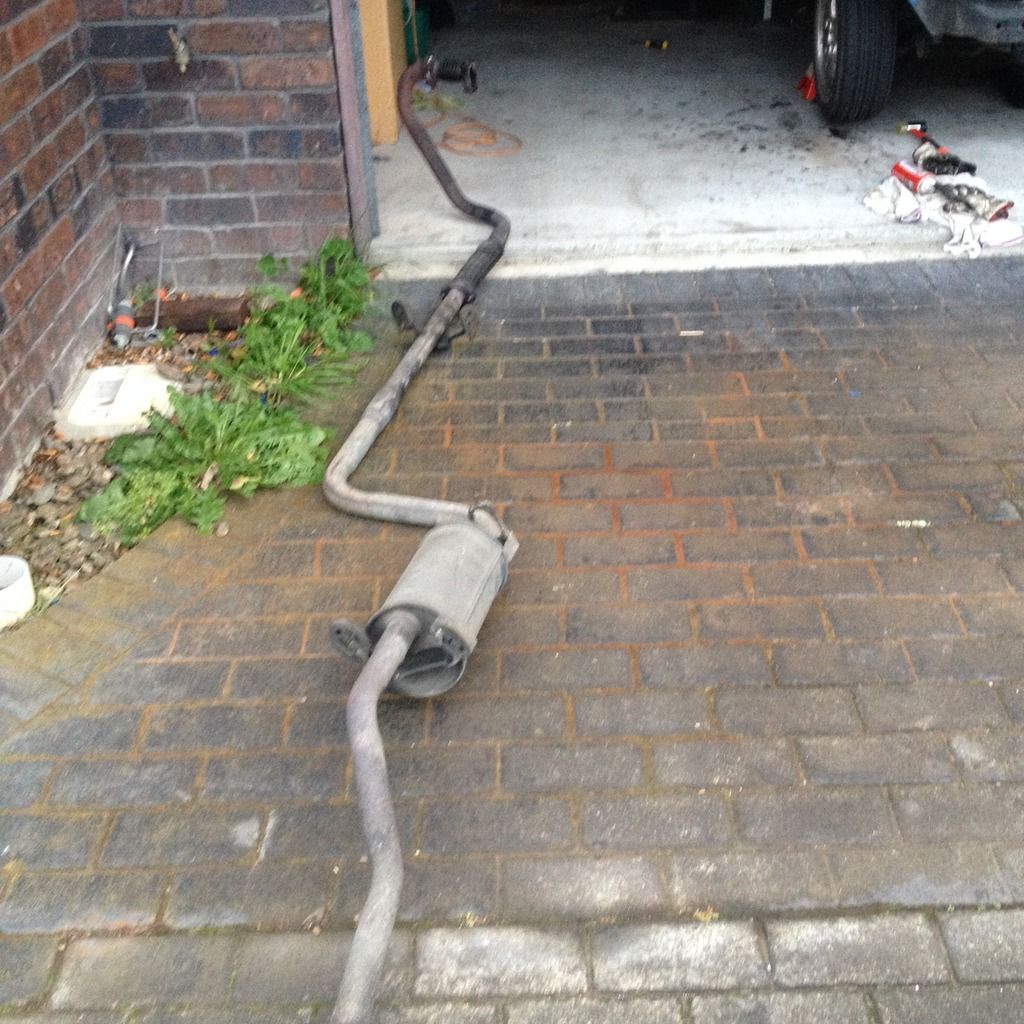
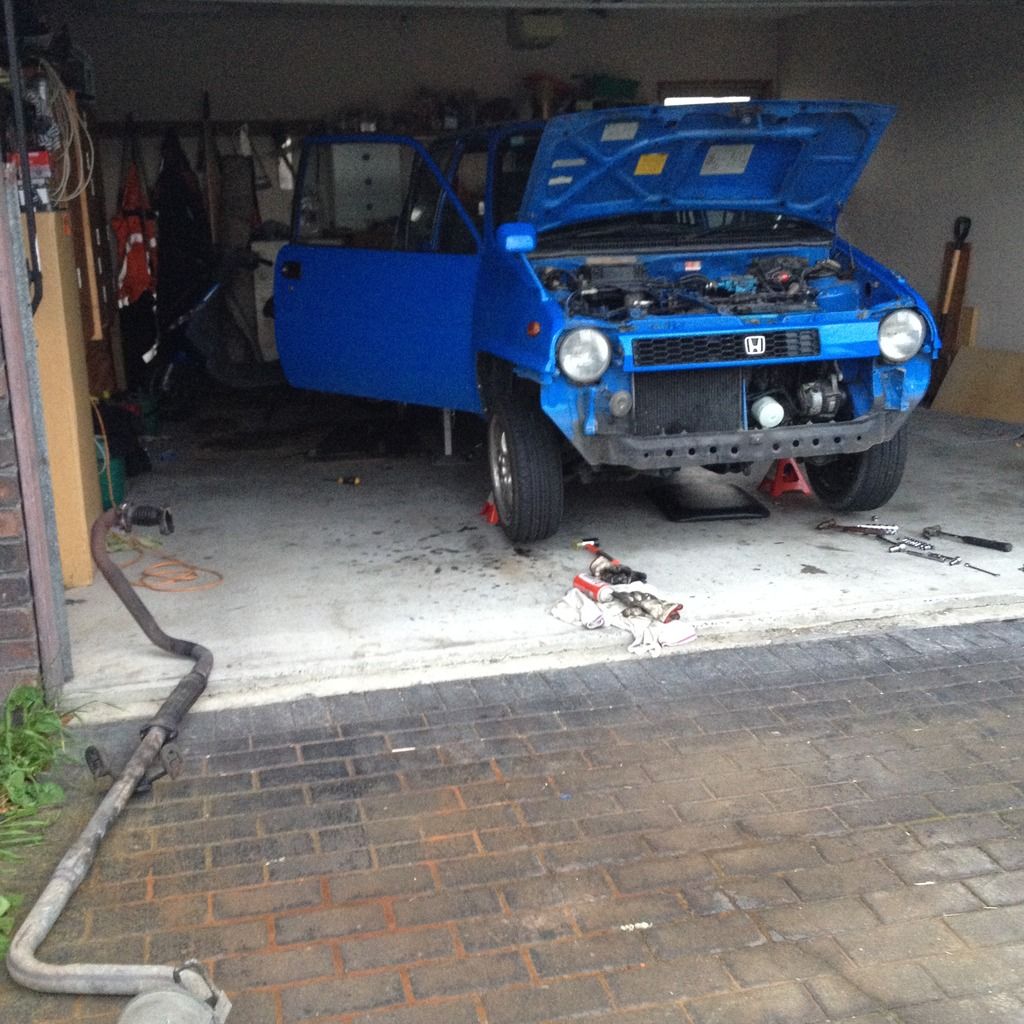
Mildly unsuccessful day, a little stumped now. Was planning on getting new turbo on today but after getting off the exhaust and flex joint off the car, it because apparent that there's no way in hell i'm breaking the nuts that hold the turbo to the manifold. There's only enough room to fit a spanner (can't get a socket over them) and no room to get any decent leverage. Tried CRC and hammer to no avail. Anyone have any ideas? I didn't get any pictures from under the car but there is a very miniscule amount of room to work with :( Anyone who has taken their turbo off before without taking the whole engine out please let me know how you did it!

Anyway, exhaust and car:

Image

Image

Bumpers are off because they're getting repainted

KingCity
Forum Enthusiast
Posts: 246
Joined: Wed Aug 18, 2010 9:08 pm
Location: Waipukurau, New Zealand

Re: bitterberry

Postby KingCity » Sun Jun 21, 2015 8:02 am

Hey bro. A answer to that gap where it says 'Fuel Cut' on that fuse board, that's only used on N/A city's, a relay unit is fitted in there to pulse the fuel pump only when the car is running because its a low pressure setup & only needs small amount of fuel so don't go out to the wreckers to get one out of a N/A City & go plugging it into you turbo one hoping it will eliminate that 14 pound boost cut as it wont, im not even sure if that part of the fuse board is wired in on a Turbo City.

As for the turbo yeah they are a bloody annoying setup, I've never liked non cross-flow heads for that reason so find it just as easy to take the motor out when trying to remove the turbo & manifolds but there have been plenty of people who have done it in the car before but they must like taking the hard road especially when the nut binds to the stud. Some people make a 'Honda Only Tool' by sacrificing a spanner & cut it down in length or heat & bend it to the right angle to get to that annoying nut on the top right of the turbo. The easiest option if doing it in the car is to unbolt the firewall to engine/gearbox mount & bracket which will allow you to get to that annoying nut with a normal length spanner & allow you to pull the motor forward more so you can get to it from the top much easier. By the way you should have just bought my turbo setup :mrgreen:

bitterberry
Forum Enthusiast
Posts: 176
Joined: Thu Nov 20, 2014 4:41 pm

Re: bitterberry

Postby bitterberry » Sun Jun 21, 2015 1:38 pm

The thing is if I were to shorten a spanner I wouldn't have enough leverage to crack the nuts. I'm thinking longer spanner but if it's too long it won't fit :(
I wanted to buy your turbo setup but it wasn't for sale when I was sourcing my turbo stuff! Out of curiosity is it still up for sale?

KingCity
Forum Enthusiast
Posts: 246
Joined: Wed Aug 18, 2010 9:08 pm
Location: Waipukurau, New Zealand

Re: bitterberry

Postby KingCity » Mon Jun 22, 2015 9:30 pm

Yeah man I still got it but I may use it again since its just sitting there doing nothing. You've gone to all that effort to get the rodeo turbo on there so just pull the motor out but like i said about removing the mount & frame to make it easier to get a full length spanner in there, that's how I used to do it but now I just pull the whole motor out.

bitterberry
Forum Enthusiast
Posts: 176
Joined: Thu Nov 20, 2014 4:41 pm

Re: bitterberry

Postby bitterberry » Thu Jul 02, 2015 4:53 pm

Oooooooooooooooooo here we go

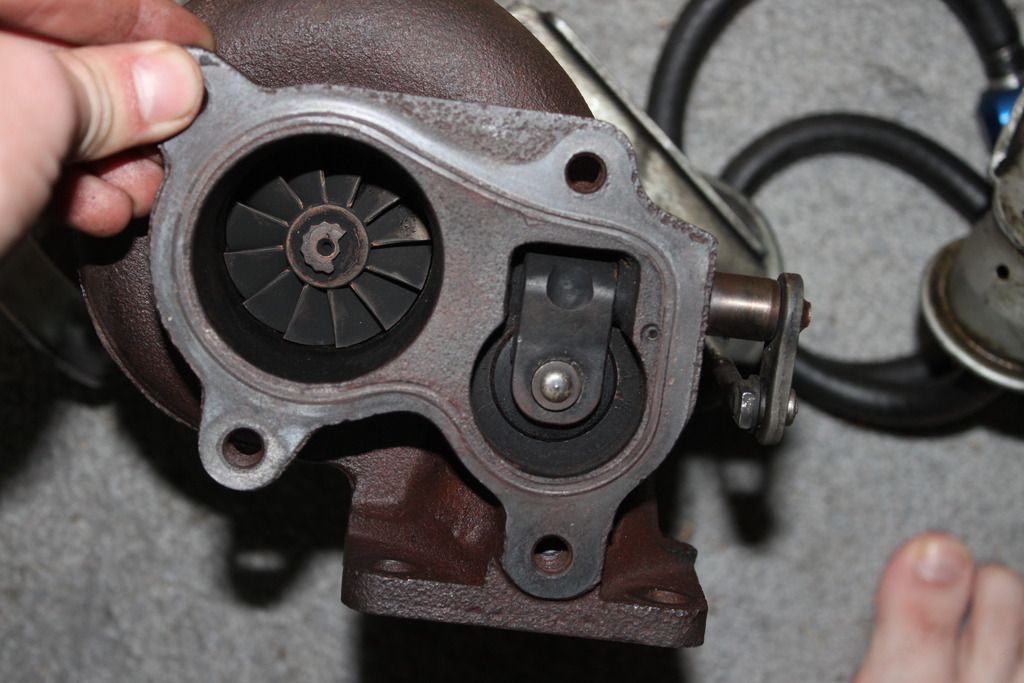
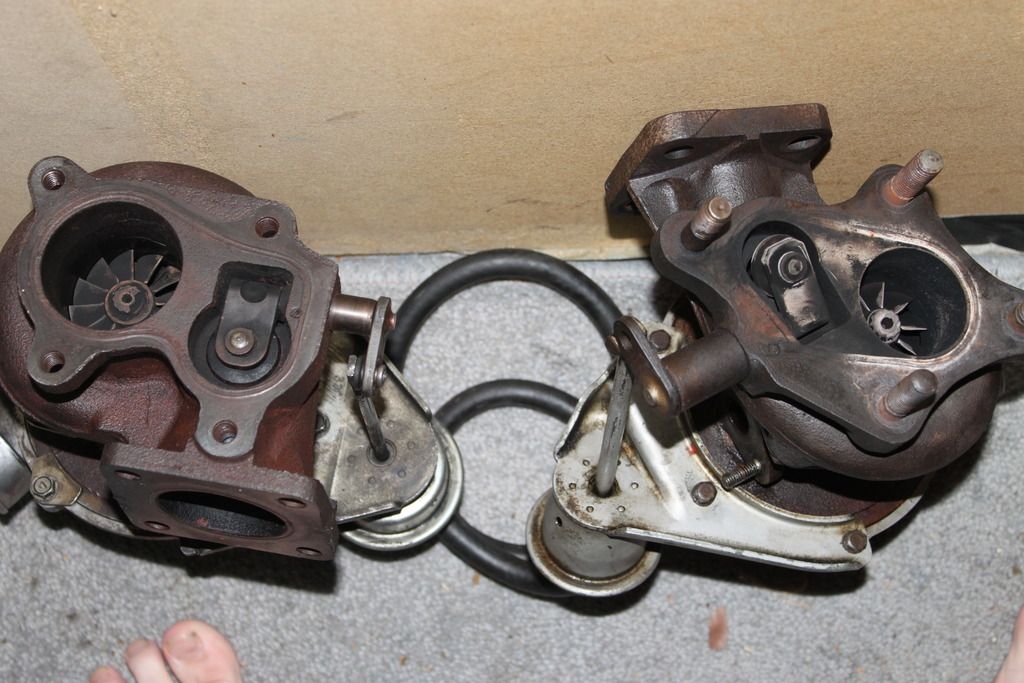
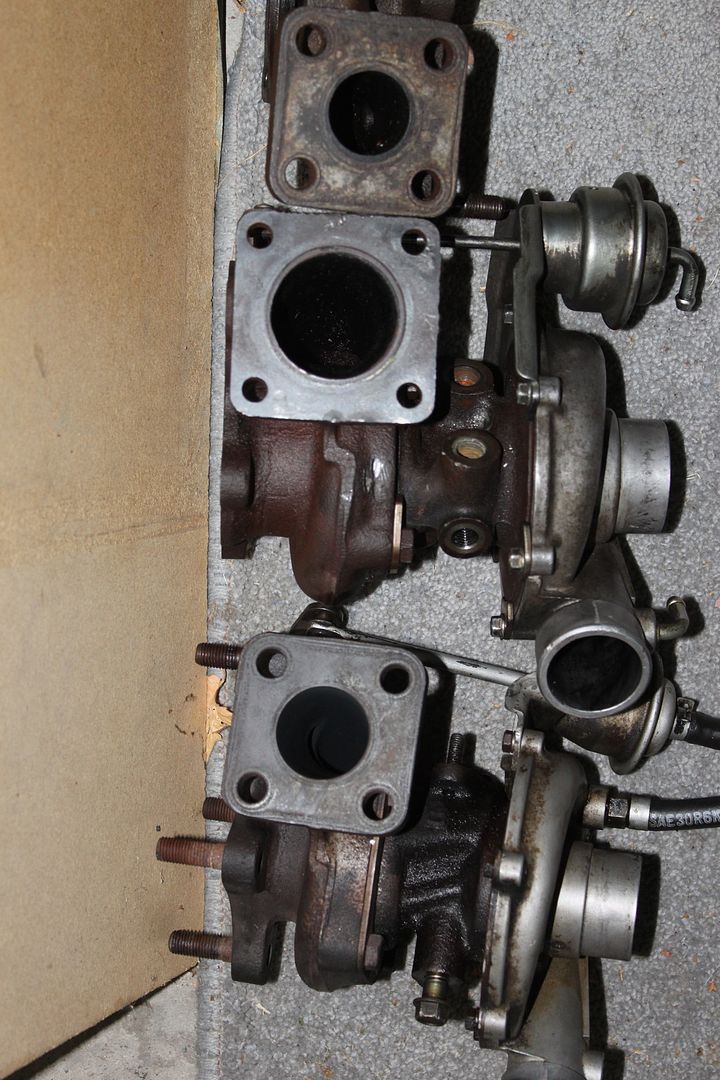
Turbo is off the car! With unexpected results! Firstly the turbo appears to be in strangely good condition. I'm kinda hoping the bearings are farked and that's what's causing my boost problemos, otherwise i'm gonna be in for a world of hurt with the new turbo. No shaft play or obvious damage to the turbo. But wait!
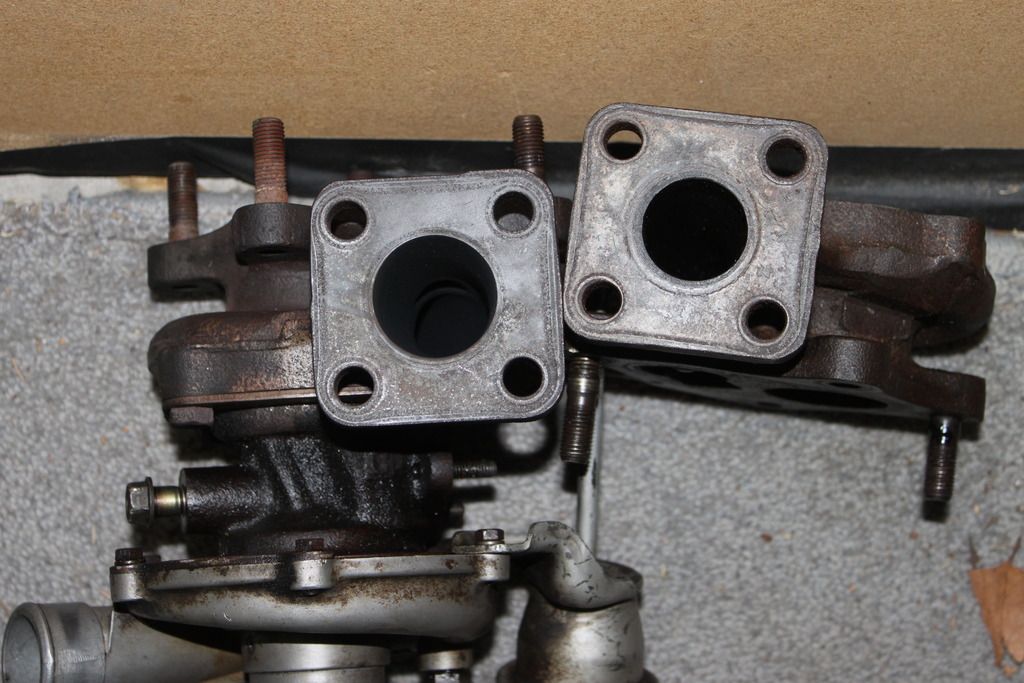
Image

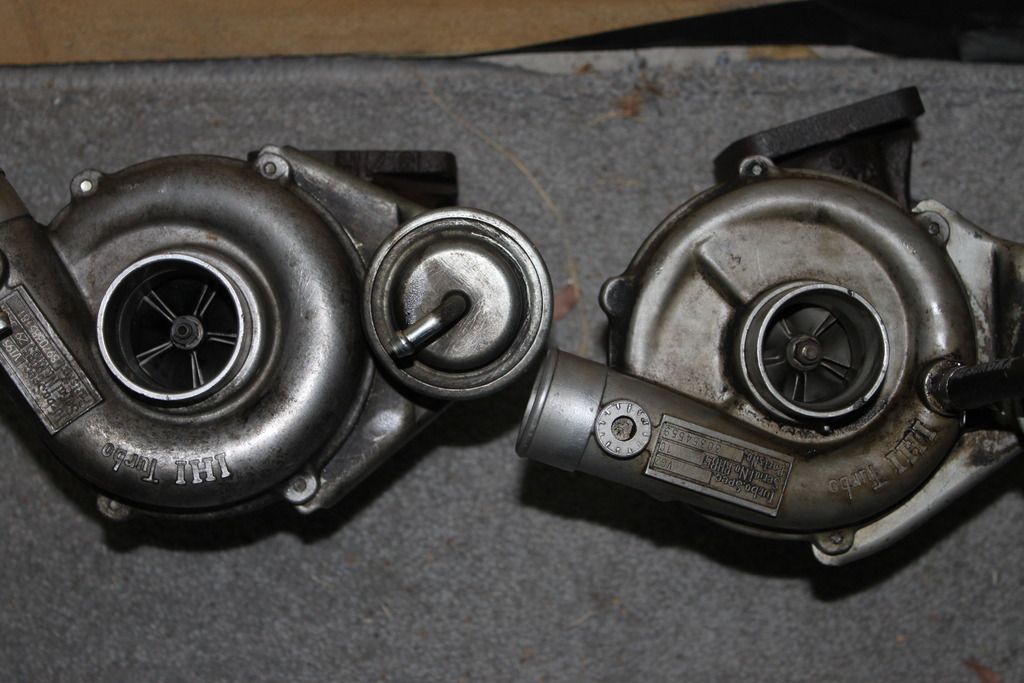
Left: Turbo that was in the car. Right: Standard T1 turbo.
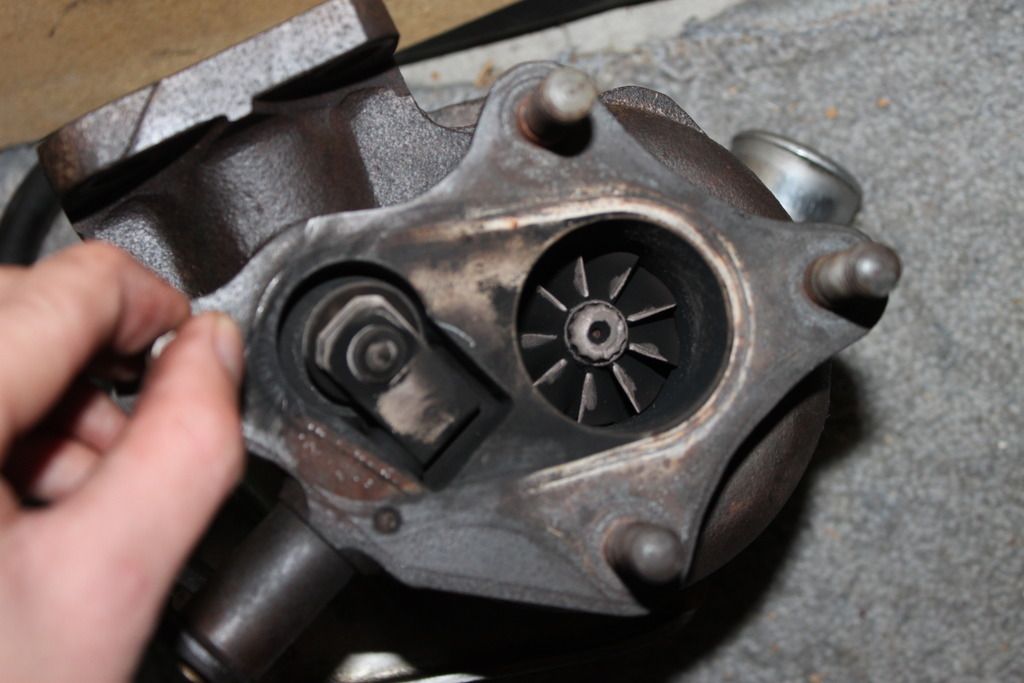
As you may have noticed, the turbo I had on the car is actually bigger than the stock T1 turbo. They both have the same label on the cover, VG2 which means that I was actually running a hi-flow T1 turbo. If it were a T2 turbo (which are slightly bigger) it would say VG3. Another look:
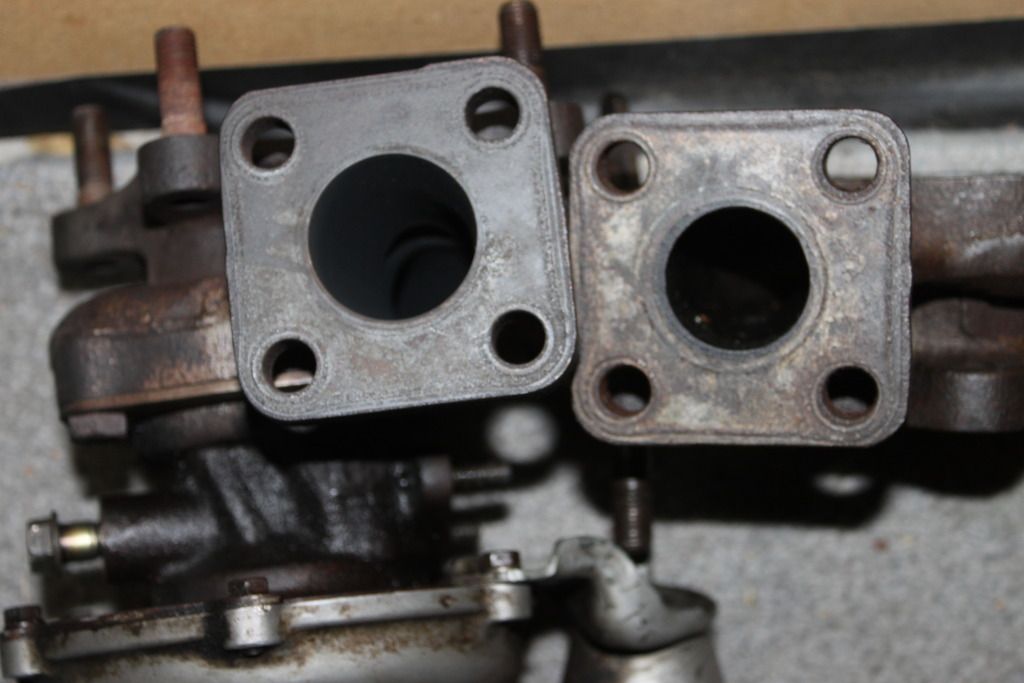
Image

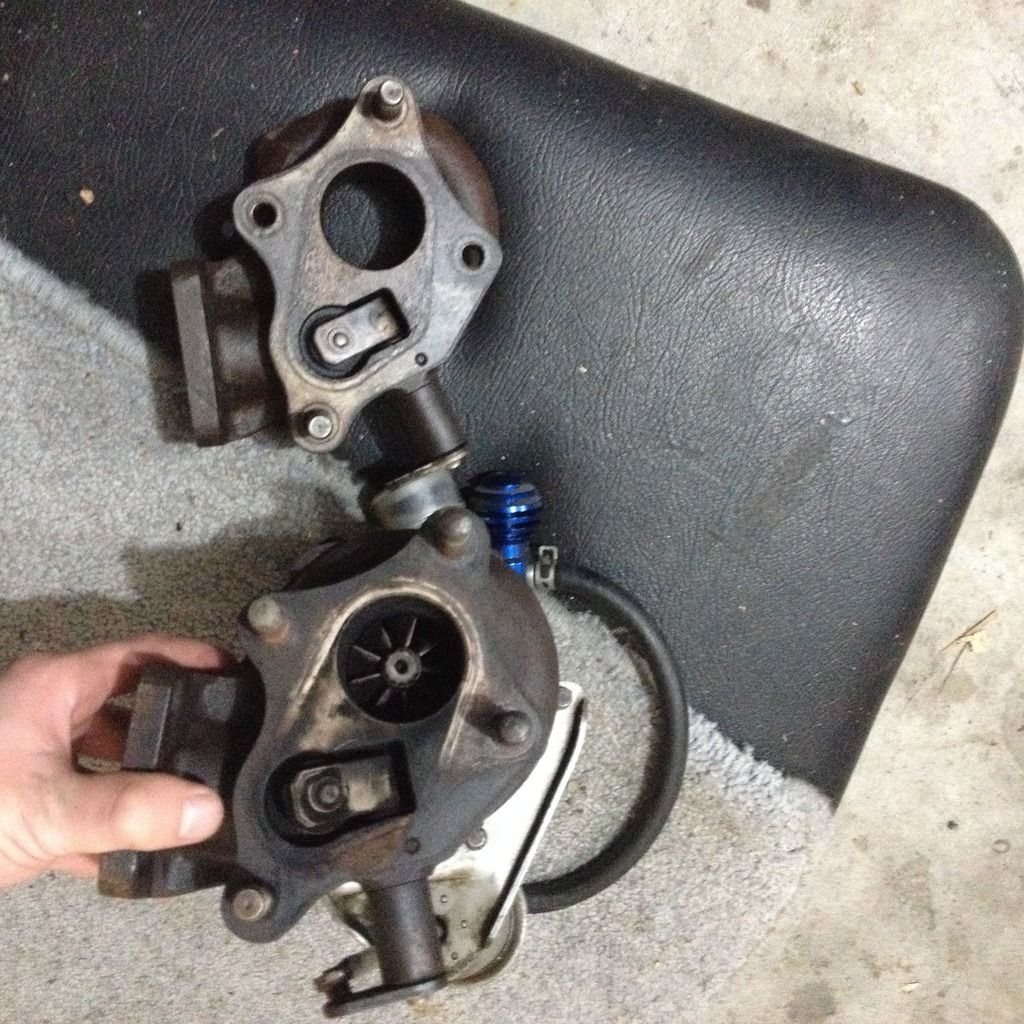
And now the fun. From left to right: current turbo, stock T1 turbo, VI95 rodeo turbo that's going in. Actually quite a substantial difference in sizes.
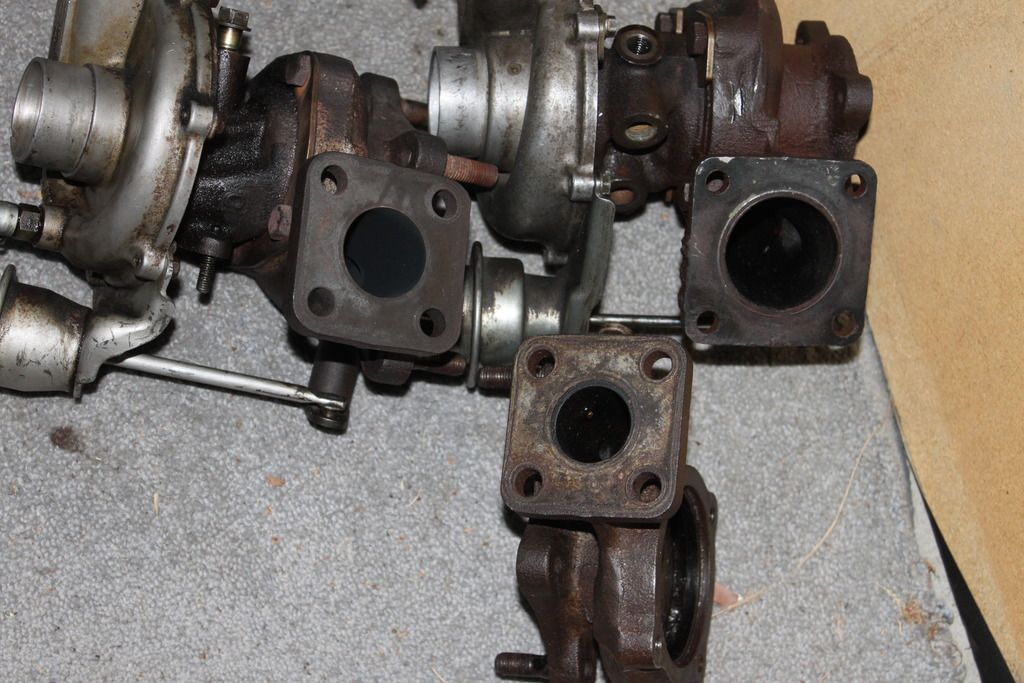
Image

Top to bottom: Stock T1, Rodeo turbo, Current
Image

Left: Rodeo turbo. Right: Current turbo
Image

Exhaust side of rodeo turbo
Image

VS current turbo
Image

Image

And then this happened!

Image

Image

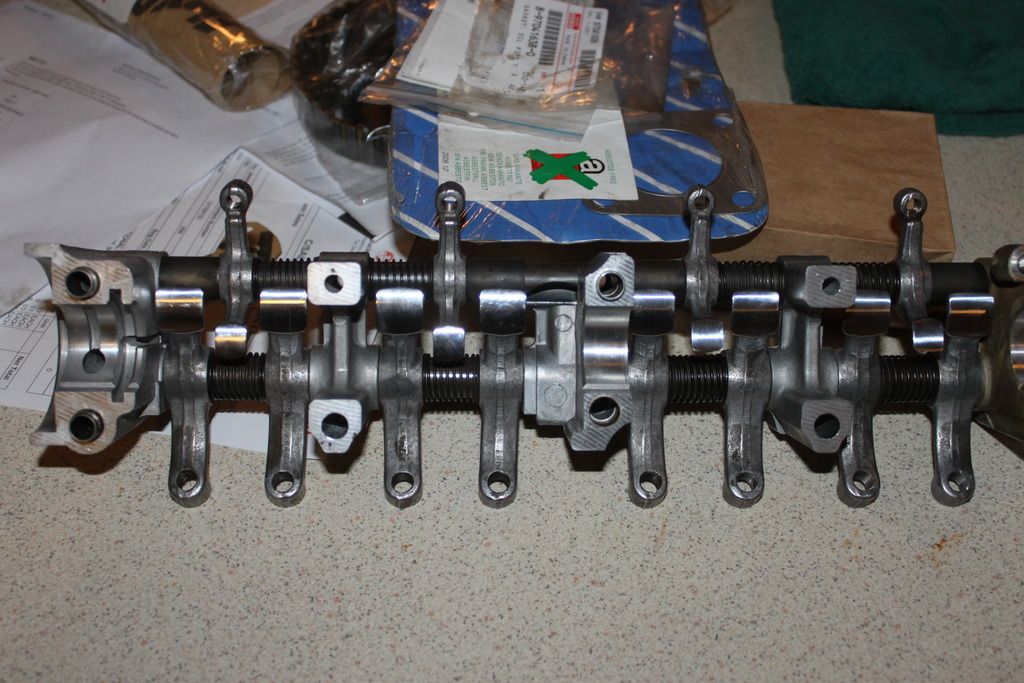
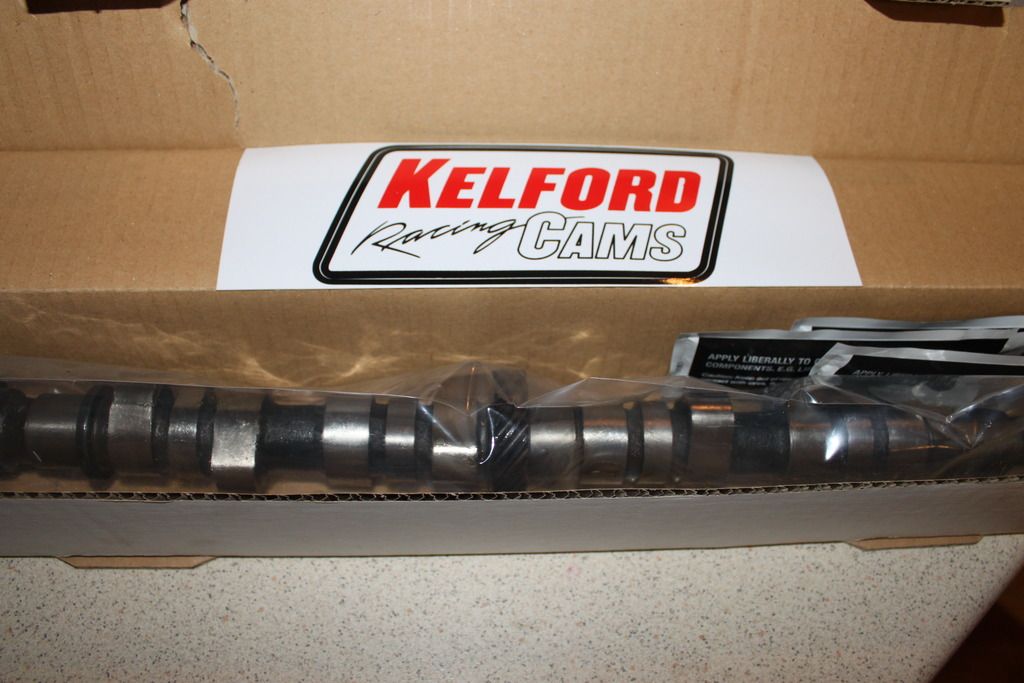
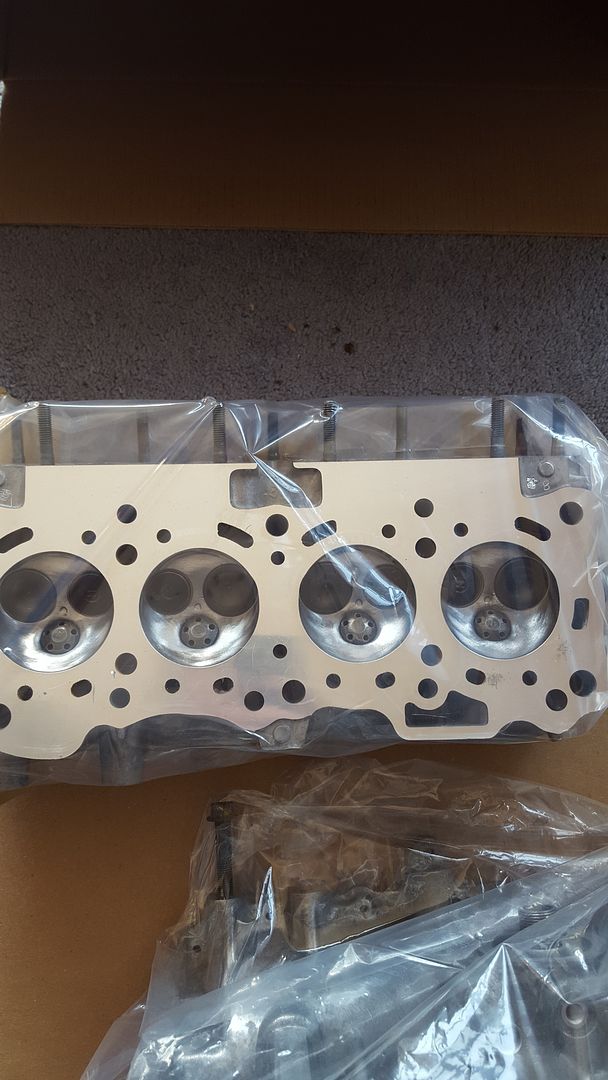
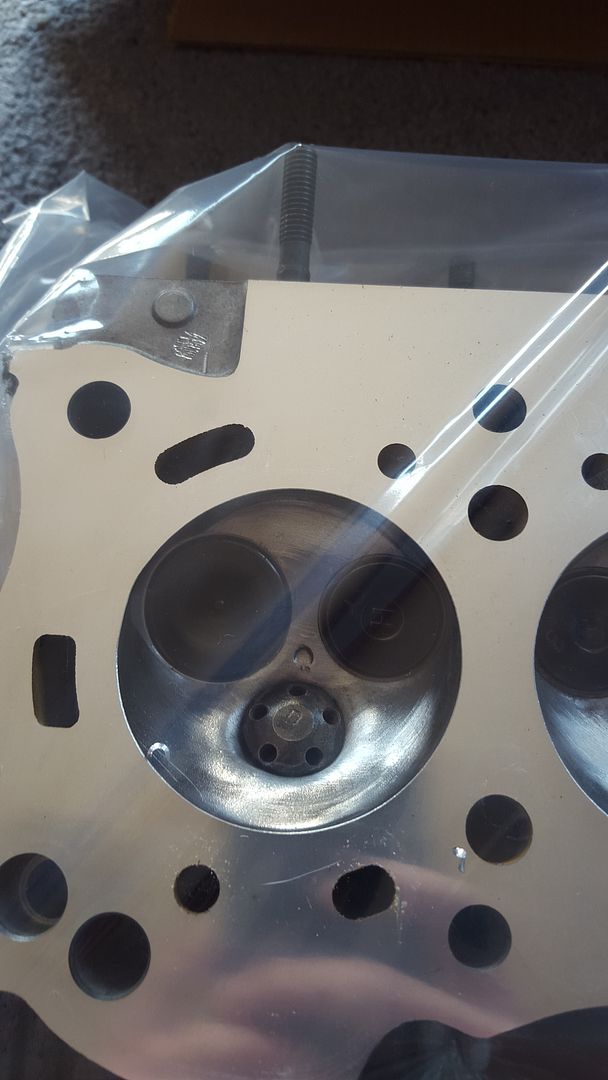
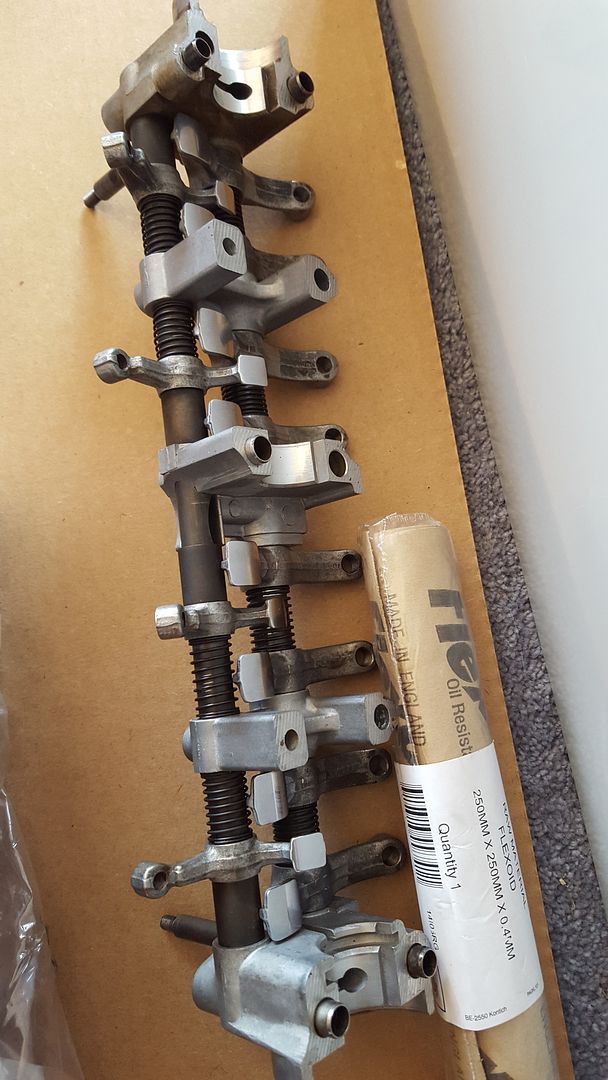
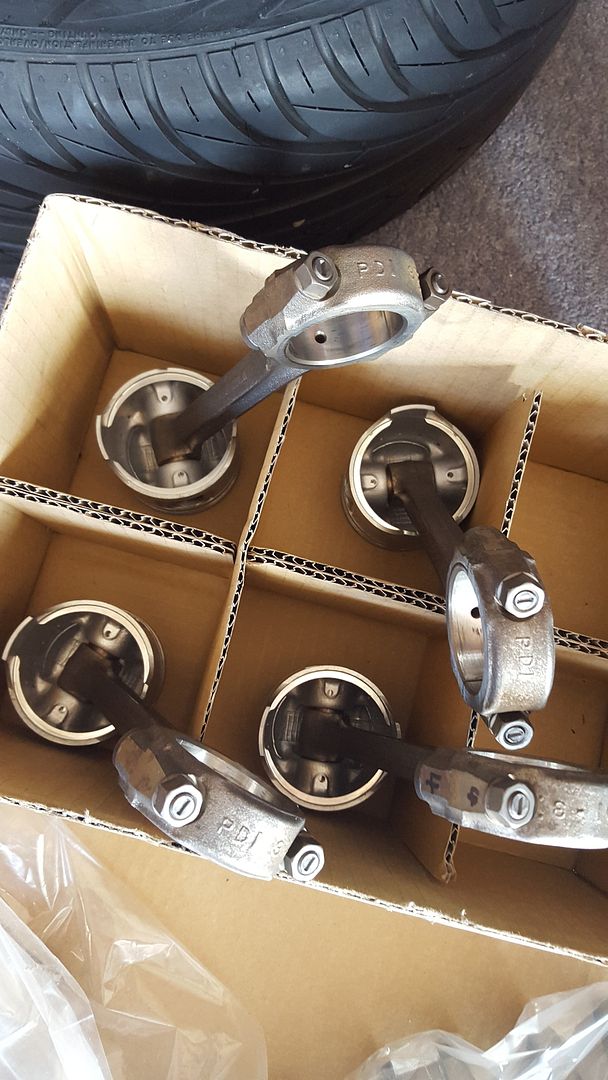
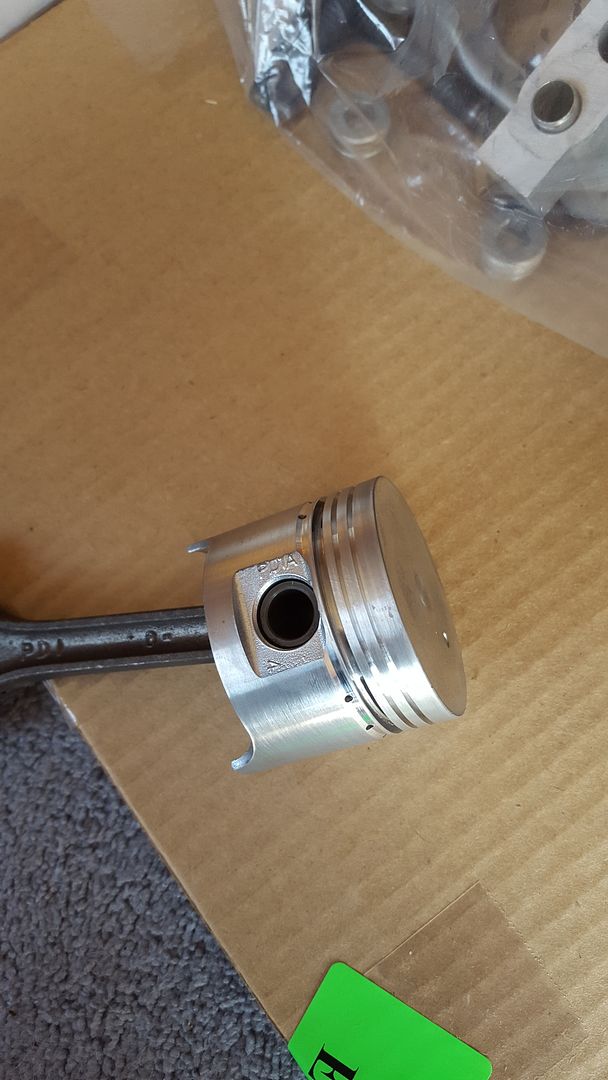
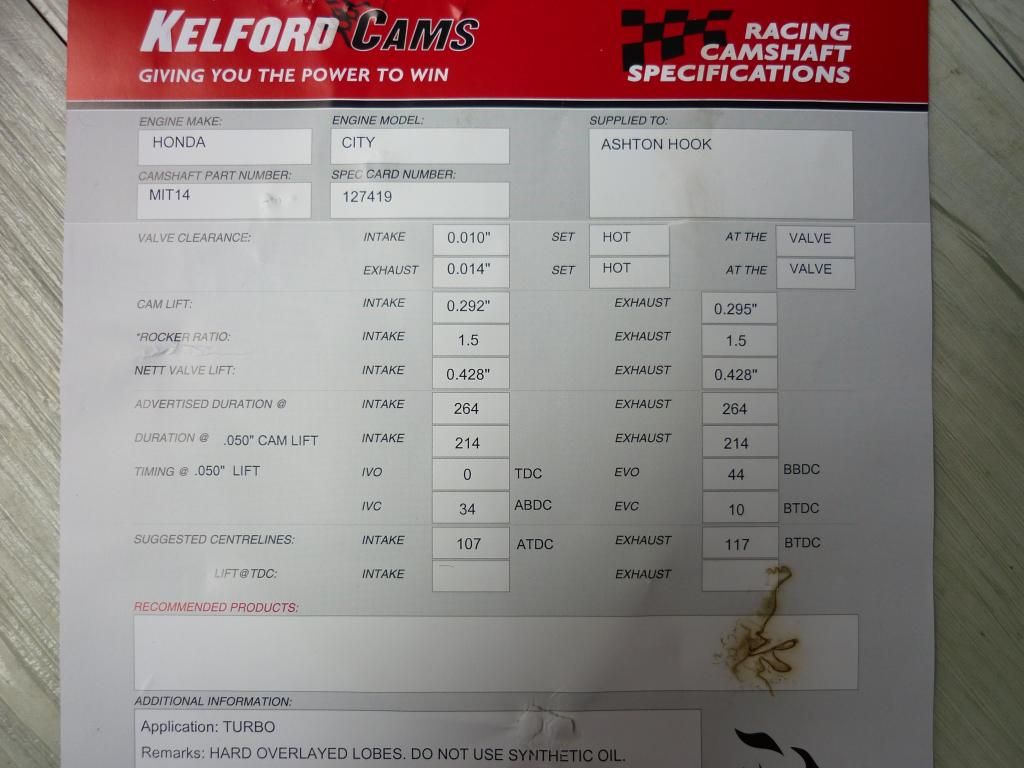
Cost me -insert maori family's life savings- but hopefully it's worth it. All rocker faces were polished, cam had to be welded and re-grinded.

Miscellaneous non-photo stuff:
Bumpers back, look better but Todd wasn't sure if they're going to be able to completely hold the paint forever, plastic painting is wizardry supposedly. We'll see.
Got an air horn set up for free. Hopefully that will go in and be hilarious.
ANTHRAXXX
Forum Addict
Posts: 659
Joined: Wed Mar 11, 2009 11:04 am
Location: Perth WA

Re: bitterberry

Postby ANTHRAXXX » Thu Jul 02, 2015 4:59 pm

Cool Beans good to see your progress Bitters :)

KingCity
Forum Enthusiast
Posts: 246
Joined: Wed Aug 18, 2010 9:08 pm
Location: Waipukurau, New Zealand

Re: bitterberry

Postby KingCity » Thu Jul 02, 2015 5:34 pm

Sorry to be a buzz kill but that's a standard T1, chances are someone has had that turbo off in the past & die grinded the inlet to improve flow, I do this with all my turbos but don't notice any difference. T2 turbos should read VG4 not VG3 & by the looks of your standard T1 turbo its showing signs that the engine is running super rich, it could be just the photos but that carbon build up looks quite thick. Oh well its back to the drawing board for you if that turbo seems fine then its got to be something else that's causing those engine issues. I also had the exact Rodeo turbo as you but gave it away to some guy in Oz as it wasn't the near straight bolt-on turbo that its meant to be according to old posts of this mod.

bitterberry
Forum Enthusiast
Posts: 176
Joined: Thu Nov 20, 2014 4:41 pm

Re: bitterberry

Postby bitterberry » Thu Jul 02, 2015 5:40 pm

Couldn't show in photos but all the openings are slightly larger, not just the inlet. Forgot to mention the rodeo turbo is easier to spin by hand than the T1 turbo i had on, potentially suggesting worn bearings? Until I have the car all back together with the new turbo I won't know if it was the problem but since the new engine will be in -at some point hopefully soon- I'm not too bothered if it was a different problem. At the very least this should fix the oil leak (I found very worn gaskets on the oil return line). You're right it definitely isn't as easy as I thought this mod would be but currently it seems to be going alright despite a few extra things I needed to do. The carbon only appears to be on the exhaust side, do all turbos not get that black build up on the exhaust side?

KingCity
Forum Enthusiast
Posts: 246
Joined: Wed Aug 18, 2010 9:08 pm
Location: Waipukurau, New Zealand

Re: bitterberry

Postby KingCity » Thu Jul 02, 2015 5:53 pm

Just thinking about it apparently there were some aftermarket exhaust housings made by HKS in the 80's for the city, they were a straight replacement for the standard housing so you just bolt the standard T1 or T2 turbo to it. All that was different was that it had a larger scroll than standard to improve high rpm performance, maybe you have one of those, does the standard turbo housing use the same stud/bolt spacing on the exit side as the one you pulled off the car? just test that on you exhaust pipe unless that has been slotted to suit both types as T2 has slightly wider stud spacing over T1.

bitterberry
Forum Enthusiast
Posts: 176
Joined: Thu Nov 20, 2014 4:41 pm

Re: bitterberry

Postby bitterberry » Thu Jul 02, 2015 6:02 pm

Went out and checked, didn't measure spacing but the standard T1 has 2 bolts where as the one i took off has 4. I can't remember if these were the two bolts we had to grind off. Do you know if a normal T1 turbo exhaust side will have 2 or 4 bolts? Here's a pic for comparison.

Image

KingCity
Forum Enthusiast
Posts: 246
Joined: Wed Aug 18, 2010 9:08 pm
Location: Waipukurau, New Zealand

Re: bitterberry

Postby KingCity » Thu Jul 02, 2015 8:27 pm

Yeah both turbos have four studs, reason I ask is that it could be a T2 housing as they are bigger than T1 but still don't have an exhaust inlet that big, that's why I assume its been opened up but yeah you could be right as it may have been hi-flowed if all holes are bigger, either way its worth keeping. Umm as for the exhaust turbine being that black well they all get black but if the engine is running right it shouldn't be getting that black I would have thought as none of mine have been that bad but I thrash my gear so maybe that's why, it could be town driving without boosting for a long time therefore not getting a lot of heat to the blades to clean them off, im not to sure so maybe disregard what I said about that as it may be normal for some engines. One other thing these turbos don't use bearings, only bushes but yeah they do wear out.

bitterberry
Forum Enthusiast
Posts: 176
Joined: Thu Nov 20, 2014 4:41 pm

Re: bitterberry

Postby bitterberry » Sun Aug 30, 2015 6:24 pm

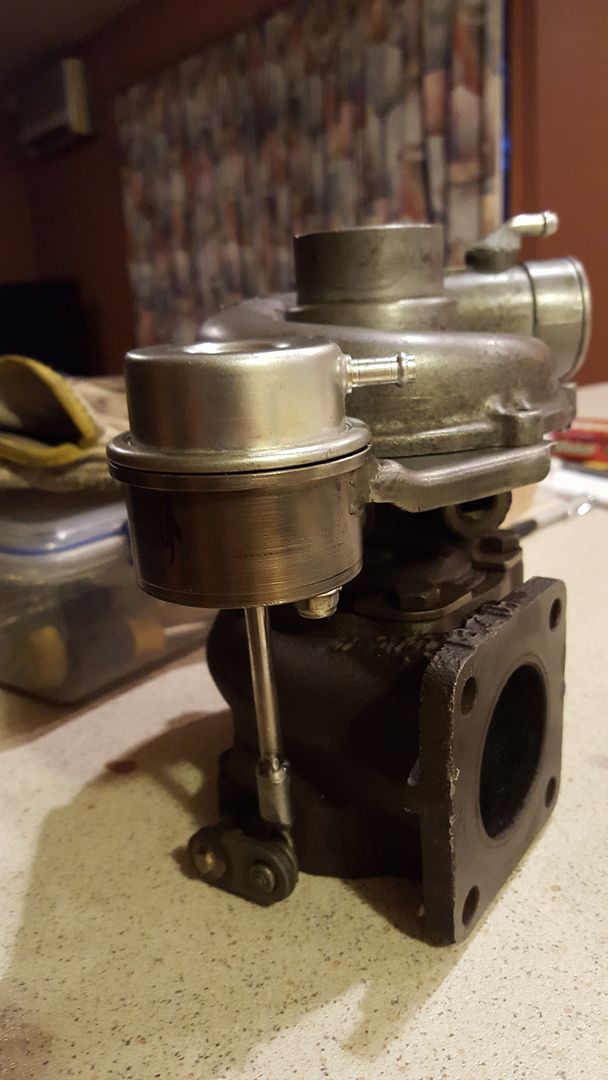
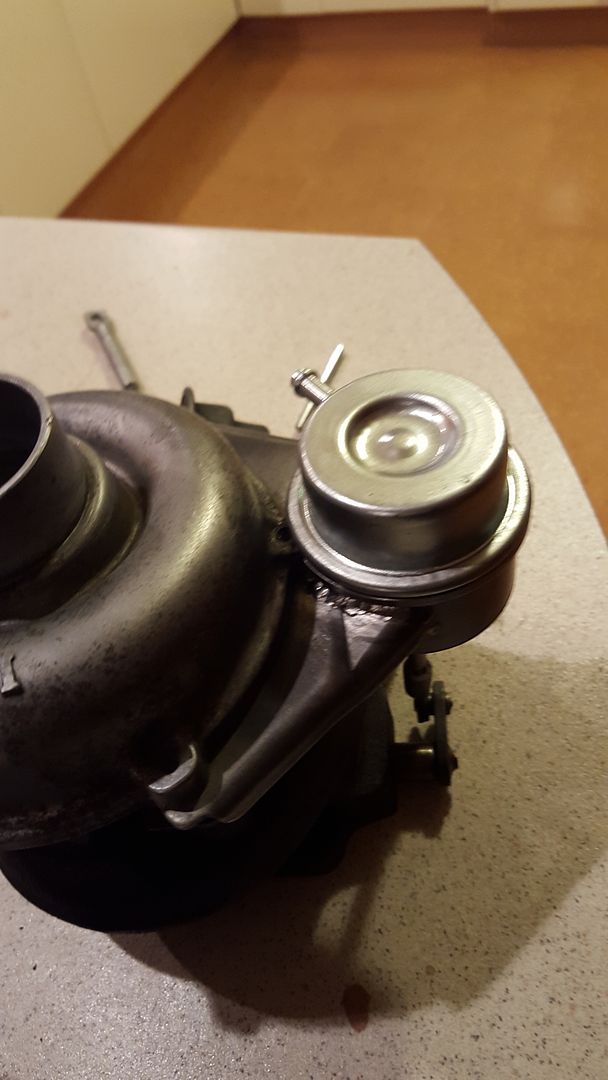
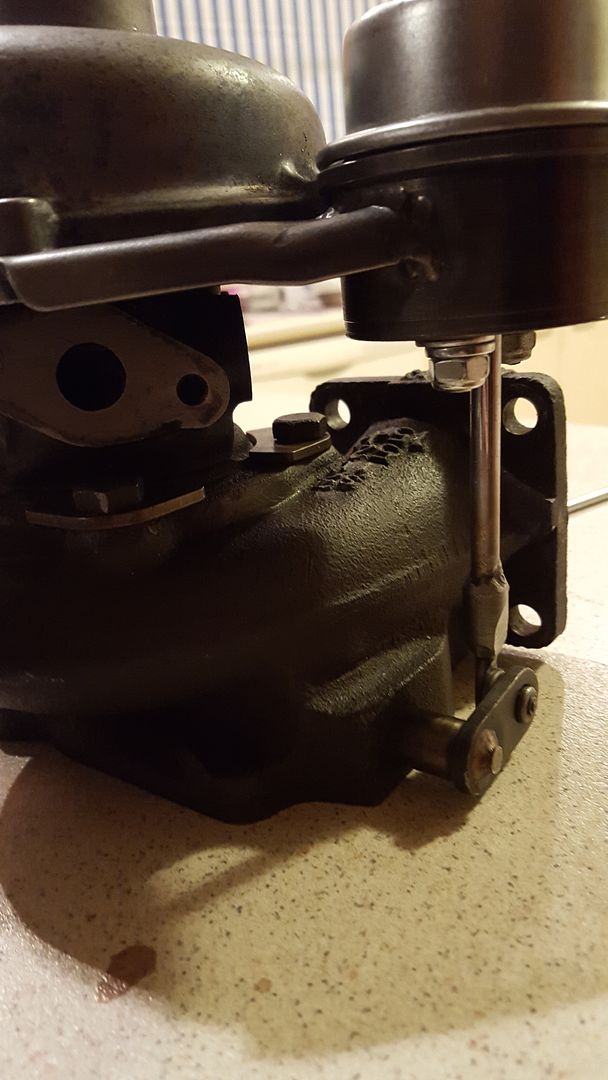
So as it turns out, this rodeo turbo swap is the furthest thing from "easy", at least with the one i used. I couldn't find specifics to which turbo is the proper one to use, so I guessed and guessed wrong. Anyway i went balls deep and did it anyway. For reference I used an IHI VI95 turbo which I think is from the 3.1 model not the 2.8 which is the correct one for the swap. After following all the instructions I found at: viewtopic.php?f=1&t=35 I soon realised that much was wrong. As I posted earlier, I had an adapter plate made to get the turbo to fit, which raised fitment issues. I had to shave the compressor cover down, rotated the turbo-actuator nipple and had to custom make a new actuator to fit. Someone at work gave me their HKS R32 GTR actuator which had correct placements, but was too long. This was the result of the custom making, chopping and welding the actuator, new bracket etc:

Image

Image

Image

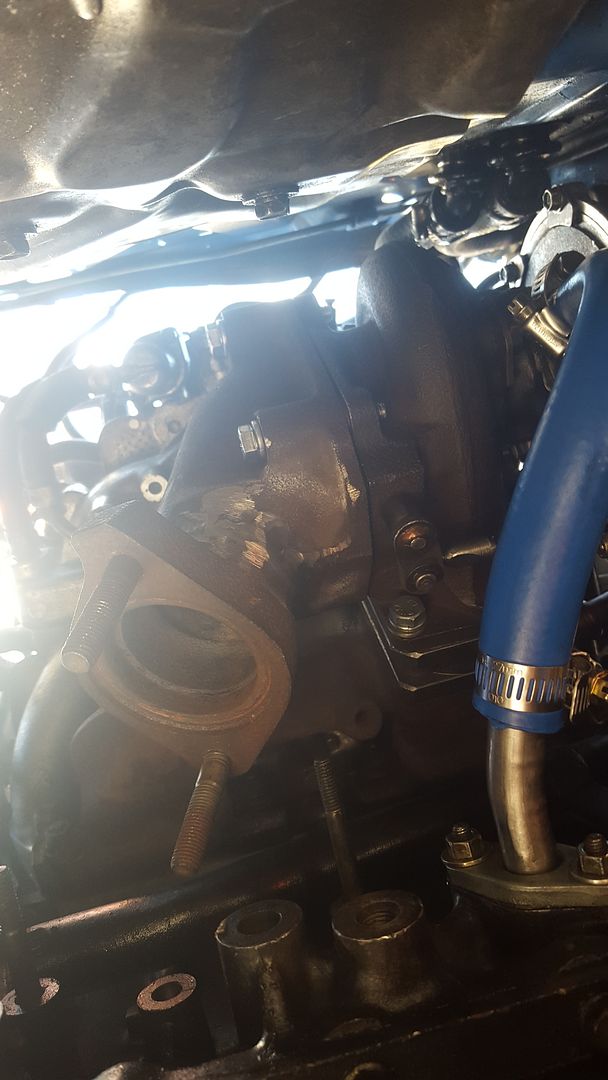
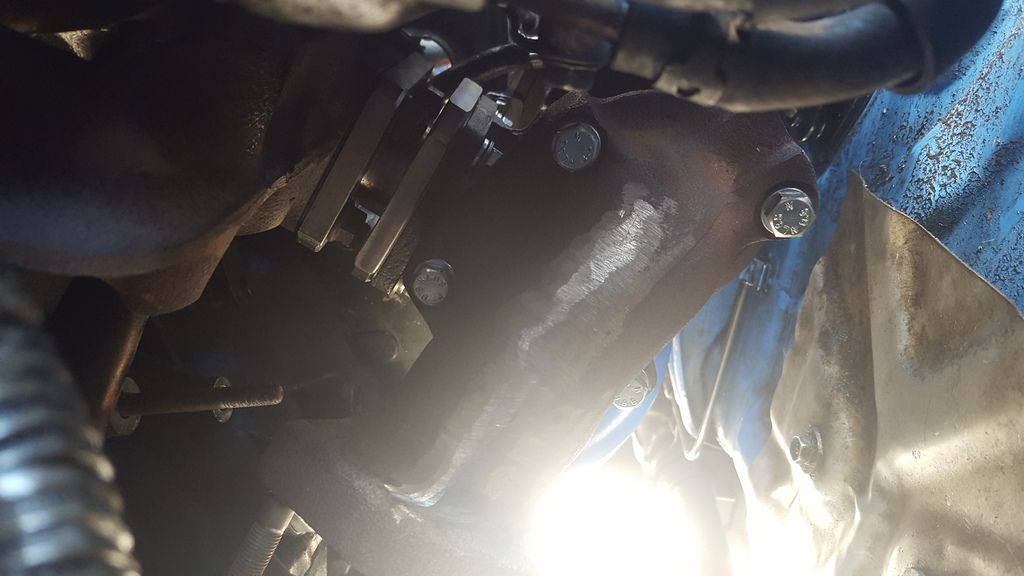
After that, I could fit the turbo and dump pipe properly (I also had to have the dump pipe cut and rotated to suit the city)

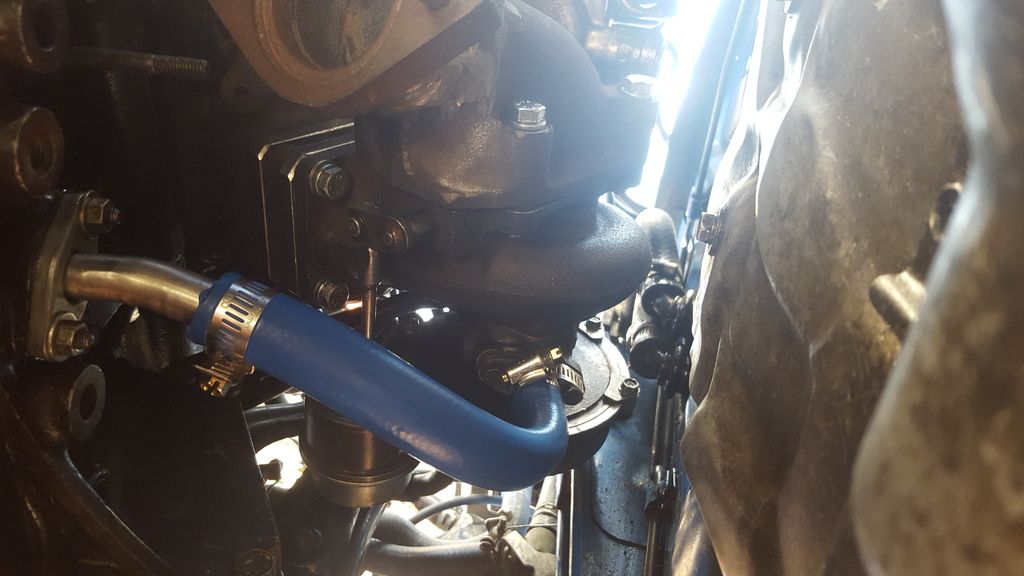
Next I needed to modify the oil return line as the old one wouldn't fit, I did so with some chopping and some silicone hose:

Image

Image

Adapter fitment with dump pipe:

Image

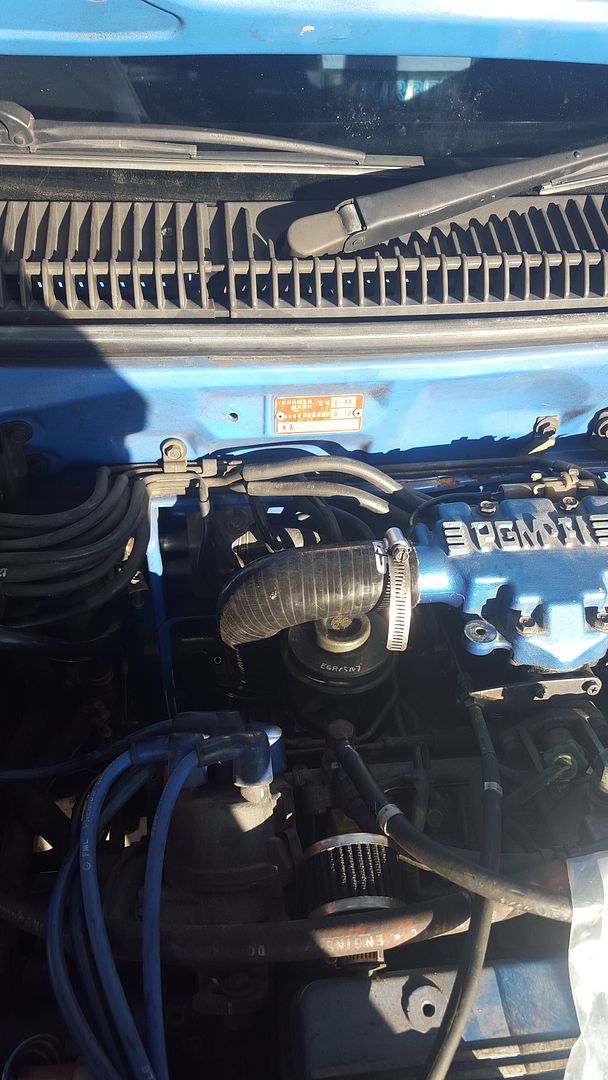
Also had to get a new turbo - throttle body tubing

Image

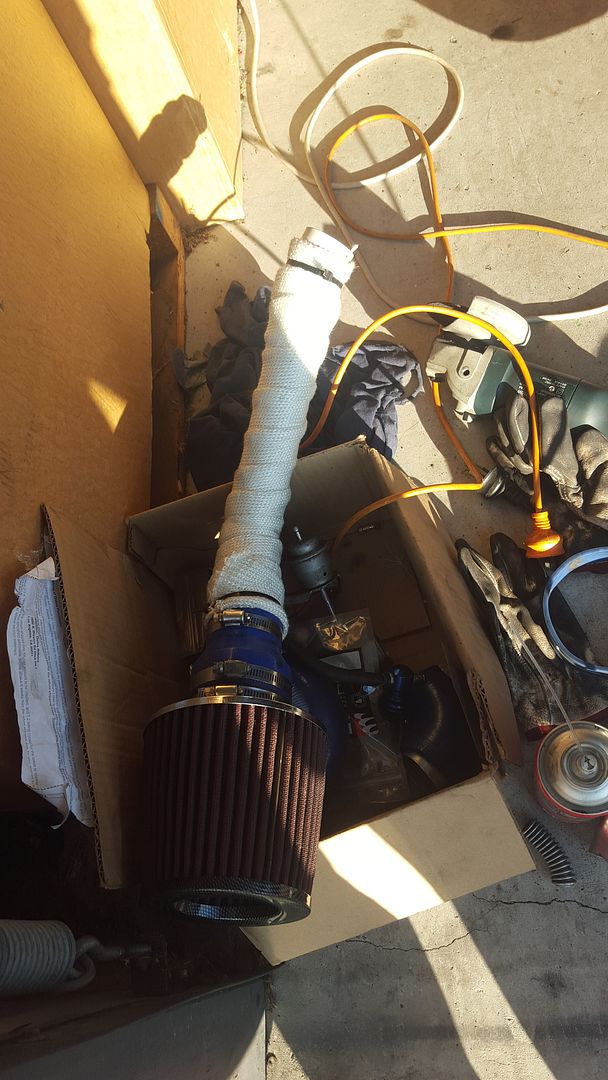
And make some new intake piping

Image

I left out a lot of small details but that's it so far. It's without an exhaust at the moment getting a new turbo back system tomorrow, shall update then.

Hard to judge how well the upgrade is at the moment because without an exhaust it isn't quite running/boosting properly but I'm hoping the exhaust fixes that.

Small snapchat video of it without exhaust: https://www.youtube.com/watch?v=x1WwhBc ... e=youtu.be


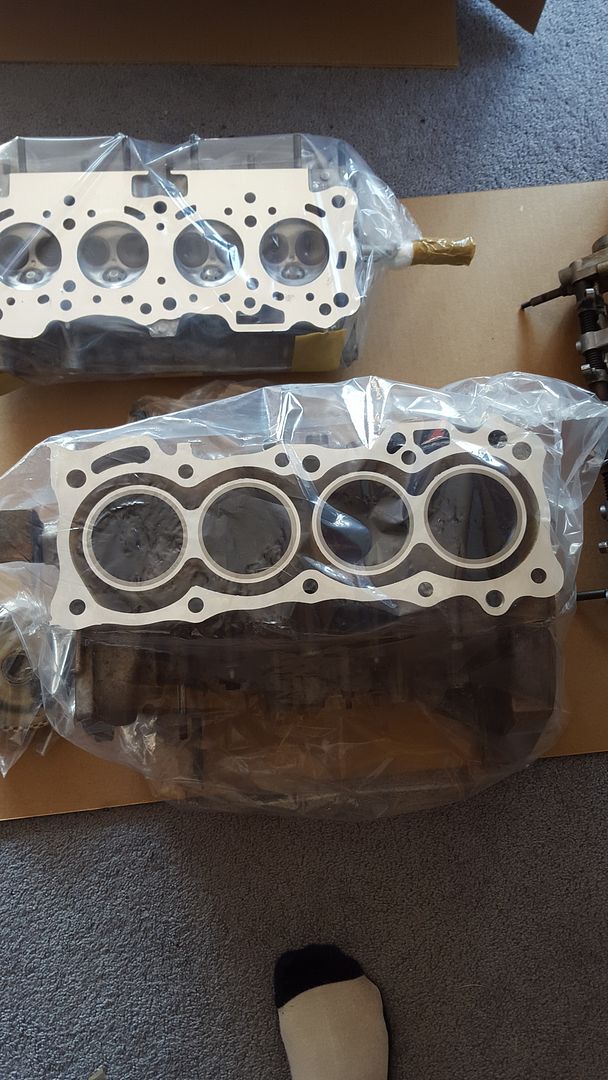
Also, stuff I hadn't posted before but got a while ago, engine parts reconditioned back from HPE

Image

Image

Image

Image

Image

Image

User avatar
spike10000
Forum Enthusiast
Posts: 137
Joined: Wed Aug 08, 2007 3:21 pm
Location: NSW

Re: bitterberry

Postby spike10000 » Mon Aug 31, 2015 10:33 am

That machine work looks magic!

What was done to the camshaft exactly? Change to standard specs?

bitterberry
Forum Enthusiast
Posts: 176
Joined: Thu Nov 20, 2014 4:41 pm

Re: bitterberry

Postby bitterberry » Mon Aug 31, 2015 11:27 am

Reweld and regrind, same cam specs are kingcity has in his build thread

EDIT: for the lazy Image

Taken from KingCity's build thread (page 1)

bitterberry
Forum Enthusiast
Posts: 176
Joined: Thu Nov 20, 2014 4:41 pm

Re: bitterberry

Postby bitterberry » Wed Sep 02, 2015 6:59 pm

Exhaust all fitted up and car is going all good. Was trying to figure out why it would only boost to 4psi for a while but when i took off actuator hose and free boosted it went to 12-13psi and blew off my exhaust outlet pipe hahaha. So turns out the "HKS GTR R32" actuator only has a 4 psi spring in it. Will install my HKS electronic boost controller hopefully in the weekend and should be sweet after some testing boost levels. If my turbo outlet pipe keeps popping off i might have to get a better clamp or something. For the brief moment when i free boosted it went pretty well fastest boost its had before which is good, so im actually relatively happy with the final product. Spools at about the same as my old one (3000, super laggy but its from the engine, -engine rebuild is hopefully coming along soon-) and this boost is stronger. Although driving it on 4psi now is super weird because it doesnt barely feel like you're getting any boost.


Return to “Member Cars”

Who is online

Users browsing this forum: No registered users and 28 guests